Showing posts with label Innegra. Show all posts

Monday, February 3, 2025

Garage Works - 2/3/2024

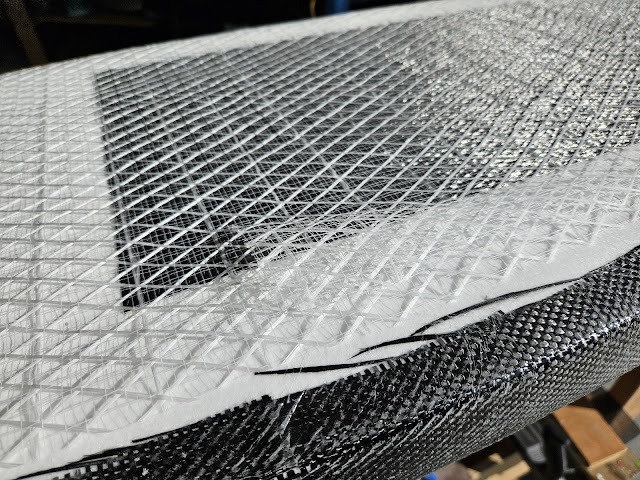
This was yesterday's work in the garage.  I laminated a thick chunk of carbon fabric where my heels/knees will go, and the innegra mesh underneath 4.8 ounce carbon fiber nose to tail.


The carbon underlay is 8.9 ounce fabric - I always have concern over saturating this fabric...


Here is the result of nearly 23 ounces of epoxy pushed into the multiple laminate layers.


And the whole thing was still pretty darn light.


I'll sand the laps and make a determination of the fill coat (pigmented is the call right now).

Wednesday, October 19, 2022

No.26 and No.27 All Done

I got the top deck sprayed this evening on both of these.


These are definitely on the low end of what I can probably ride (volume wise), but it will be fun experimenting with these.  No.26 (above) came out heavier than No.27 - even though it is smaller.  The difference (besides the size) is the cloth - a carbon and innegra weave, and the epoxy (pro epoxy).  I saw this between the WWFB and the Narrow one - the narrow one has both carbon and innegra on both sides and ended up heavier.


Tomorrow, I'll get them outfitted - deck pads, leash cords, drill out the vent holes and install the vents - then let the deck pads sit for 24 hours (or maybe I'll get the deck pads on tonight...)

Monday, August 15, 2022

Garage Works - 8/15/2022

I decided to truly take a break from surfing/foiling today - so I used the time to get these two prone boards advanced.

First I routed out the slots for the reinforcement blocks.  Then I cleaned up the edges so the blocks would fit in snug (not too tight - need room for the fabric).

These first pictures are the carbon layers added in.  I use offcuts from the bottom laminate from previous boards (this stuff is not cheap - I try and use all of it).


On these boards, I did something different than previous builds.  I broke up what would normally be a combined step into two separate ones.  In the single step version of getting the fabrics wetted out and then placing the reinforcement block immediately after, the top fabric usually pulls.  Even though this part of the board is never seen in the finished product, I still wanted to do it so the fabric doesn't pull.

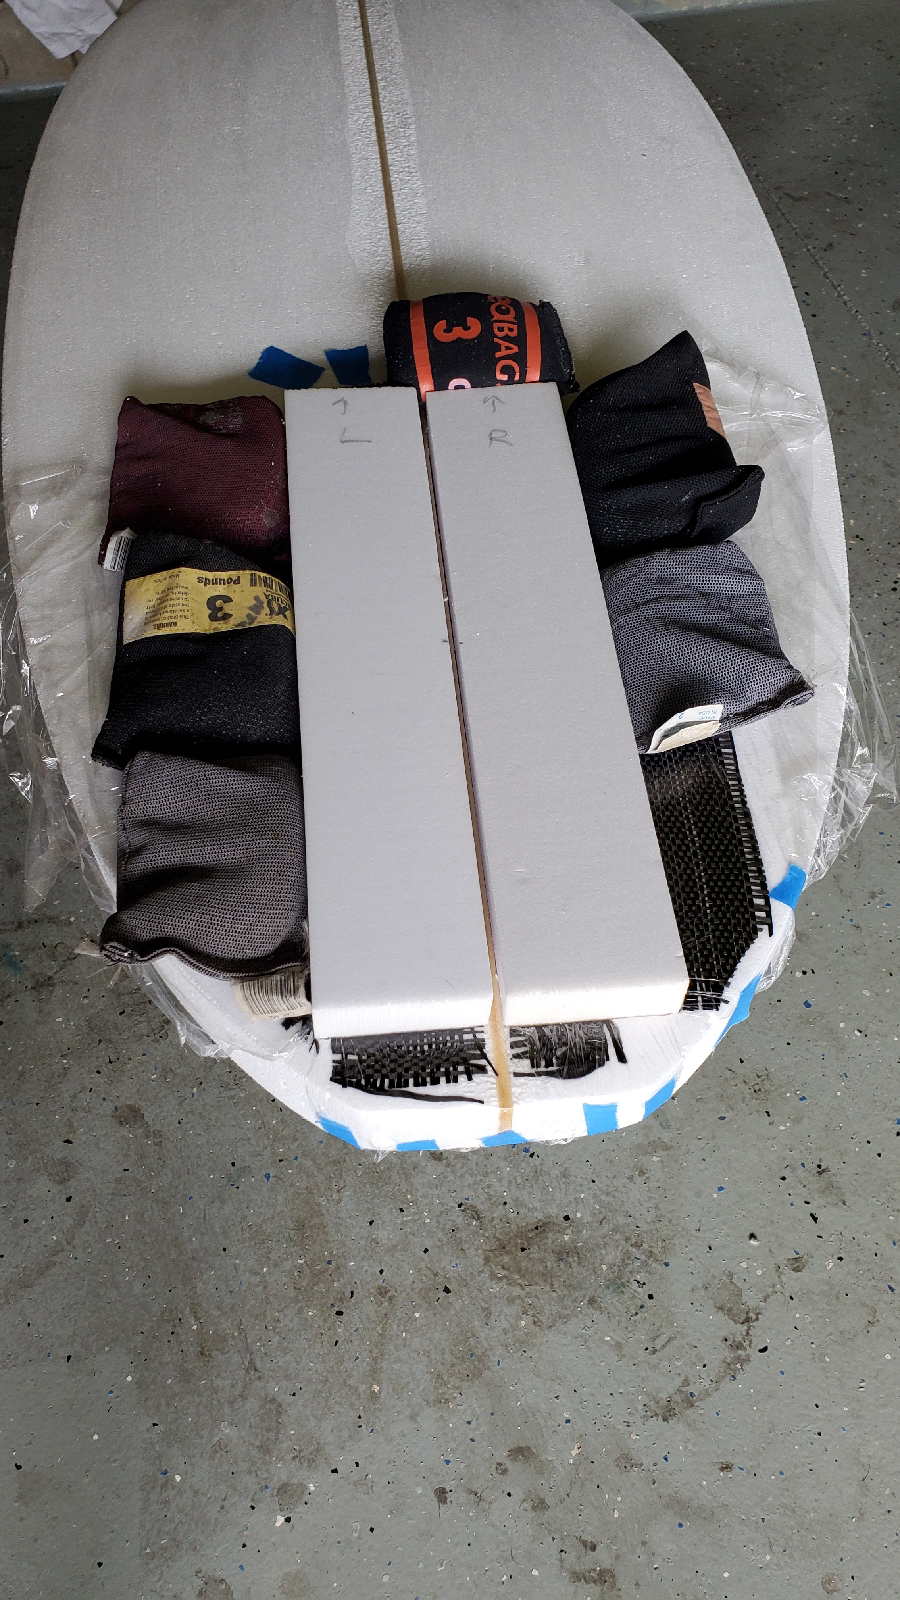
This first of two separate steps was to wet out only the top part of the fabric that would stay above the routed out hole.  I placed saran wrap over the fabric, placed the blocks in place to hold the fabric in place and added soft weights to help keep the fabric down.  


The next step was to add some more fabric to the bottom - this is scrap innegra (even more expensive than carbon fiber), then I wetted out the bottom and sides of the hole, added a layer of epoxy thickened with Thiksil, and then placed the block in.


I filled the gap with some straight epoxy (flows into the gaps easier), then covered the blocks with saran wrap and placed the weights on the outer edges of the blocks.


The next step on these will be to rout out the finbox slots in these blocks.  Then I'll flip the boards and rout out a thin layer of foam on the top deck where my left heel goes - I'll press on a thin sheet of divynicell.

From there I'll laminate on the top deck fabric, then flip the board and epoxy in the finboxes and laminate the bottom deck.

There's more (a lot more), but these prone boards get done faster than the wing boards.

Saturday, June 4, 2022

Garage Works - No.25

After surfing this morning, I worked on some garage projects.  I got the reinforcement block for the mast track sanded down to match the height of the surrounding blank.  Then I lined the hole with carbon and a layer of innegra.


I used about 5.6 ounces of epoxy to line the hole and saturate the laminates.  I used a roller to spread the epoxy evenly.  Then I spread some epoxy on the reinforcement block to make sure there would be a bond, and then stuck it in.

There was a little pull on the side pieces of carbon, but nothing catastrophic.  I used saran wrap to keep the laminates and the epoxy flat. 


I also finally epoxied the divynicell strips together (this needed to be done a long time ago).  I'll figure out what size these need to be assembled to in order to use them as footstrap reinforcement blocks and augment mast track reinforcement blocks (under the ends of the Futures boxes). 


Tuesday, December 21, 2021

Marvin's Redecking Project Done

Got this done last night.  Sanded to 400 grit (wetsanded) - it came out really nice!


Working on this board makes me want to shape one like this...

Monday, August 31, 2020

#19 (Wing Foiling Board) Done!!!

This board is done!  I got the Marine Grip on the bottom deck, and the traction pads on the top.


I'll let this board sit in my garage (autoclave) for the rest of the week to have everything set in place and let the epoxy cure up some more.  This picture below is showing the handle in the bottom - shapers have recently started adding this so you can carry the foil upwind while carrying the wing downwind.


That time will also have me get out on the Hypernut a couple to several more sessions.  If I can tack and jibe on foil, I'll feel more confident dropping down to this board.  We'll see if I can actually get there or if I can wait.


I wanted to point out the difference in the laminate - the weave you see is the innegra layers.  This stuff is supposed to be bullet proof.  We'll see - considering I'll be starting on my knees most if not all the time.  No. #19 all pau!!!!

Thursday, August 20, 2020

Glassing the Top Deck of the Wing Foiling Board

I got home and was nuked from work.  I changed my clothes, and decided to take a nap instead of surf/foil.  It was also pretty windy so I figured I wouldn't be missing much (haven't gotten the wing yet).  After a short nap, I did get to grinding the laps from yesterday's work, setting up the glass layers, and laid up the epoxy.

The grinding wasn't bad - especially knowing I was going to add some cover layers today.  I did see what happens to the innegra fibers when you try to sand them - worse than carbon.  The glassing schedule was 2 layers of the 2 ounce innegra, all the 6 ounce fiberglass I had - which covered half the board, and all the remaining 2 ounce fiberglass I had.  These bolts are all 36" width to wrap the rails on this 26" wide board. 

I took my time cutting the laps out.  A cut here, pulls to see how the lap would sit and more cuts to get everything to sit tight.  The splice between the two top sheets was as easy as laying the 2 oz on top of the 6 oz.

I used 1x6 oz and 5x4.9 oz loads of epoxy to glass the top.  I had to use a hammer to get the old roller insert off the new roller - I really like this brand of roller - but I now know to take off the old roller immediately after the glassing job.


I also used some saran wrap on the back corners to get the layers to conform better - it all turned out really nice.  Tomorrow will be lap grinding and possibly fill coating.  Since that goes fairly quickly, I may try to get that done as soon as I get home and then get a session in.  We'll see.

Wednesday, August 19, 2020

Glassing the Bottom Deck of the Wing Foiling Board

I finally started the glassing - first layer was 4.7 ounce carbon - just kept it to where it needed to be to conserve pumping energy - so it came short of the nose.  Next was a full coverage layer of 2 ounce innegra.  This did not behave the way I thought it was going to - yes it is white, but the weave was space out far enough to see the carbon beneath.  I topped it all with a cover sheet of 6 ounce fiberglass (so I can get a better fill coat and so I can sand down the laps).


I cut slots in the fiber after laying each down.  I had to remove the tape from the finbox slots that I placed earlier - that way I could aim the scissors down in order to cut out a similar slot. 


I ended up using 6x5.6 ounces of epoxy to glass the bottom.  I also used the Home Depot thin knap rollers - these are winners by the way. 


The slots in the fiber layers over the boxes/handle worked really well to let the air bubbles out.  In fact this whole glassing job went surprisingly well (hoping I didn't just jinx myself).  Tomorrow is grinding the laps, setting up the fiber layers for the top deck (2 layers of innegra topped with a layer of 6 ounce fiberglass).  I may actually try doing a cut lap on this one (we'll see how I feel about that tomorrow).

Sunday, May 3, 2020

Dualie Stubby Done

I got the gloss coat (clear glossy polyurethane spray) on the bottom deck this morning.  I used some decals I got from a coworker to label it instead of using spray paint.  I think it looks way cleaner - but we'll see how it holds up to usage.


I also got the dual single fins on.  This thing looks fast just lying there!!!


I put a little more nose rocker into this board so I can take steeper drops - a lesson learned from the asymmetric fish at Chun's.


A long time ago I had an RRD Kiteboard with this same tail configuration.  I could throw that tail right through a roundhouse cutback like a hot knife through butter.  I'm really excited to get this board into some energetic waves to see if I can do similar turns.


I still need to do a tiny bit of work on the top deck - fill in an edge on the lease plug and some rough spots on the tail.  But before I go foiling today, I'll get the epoxy work done so I can spray the remainder of the board before this evening.  I also want to test the durability of the innegra.  This stuff was not that hard to use, but sanding was a bear trying to stay away from the fibers.  If it resists pressures and other abuse, perhaps it'll be worth the extra effort.